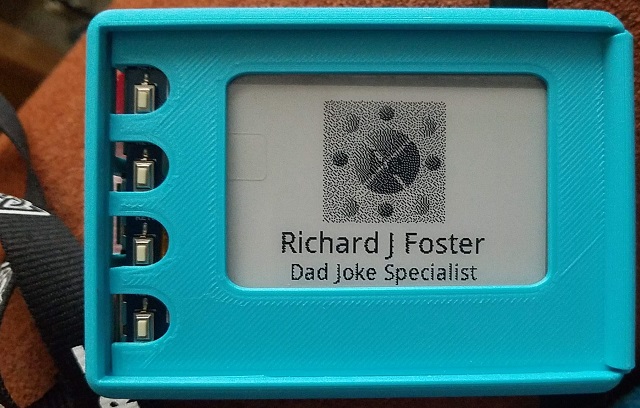
One challenge of being a FIRST mentor is that we have to let the team succeed (or fail) by themselves. We can give suggestions and advice, but it is entirely up to the team if they want to take advantage of those comments or do their own thing. It's probably the thing I found most challenging. I wanted to get into the code design and tell the coding crew what (I think) they should do, but then there is a distinct possibility that they wouldn't learn anything (or recognize how much understanding many of them already have). So how to proceed? Well... I have no idea if it'll work, but my plan is to use this post, and almost certainly several additional posts (at least two, but probably more), to show them what I do when I have a specific goal in mind, but no pre-specified plan for how to get there.
Just as the annual FIRST challenge varies, I want what I create to be something different from anything I have created in the past, while not being so far beyond my skills and experience that I have little to no chance of accomplishing it. (For example, while it might be fun to create a robot quadraped like James Bruton (opens new window)'s Mini Robot Dog (opens new window), I would probably only be successful by blindly following the plans that he so generously shares... and it would take some time just to get enough funds to acquire all the parts thanks to the delightful money-sucking devices already at home known as children.)
So... what am I going to create? After thinking about it for a while and contemplating possibilities I decided to create a silly badge that I could use for FIRST outreach activities with Team Ironic. What I have in mind is complex enough that it'll demonstrate breaking code apart into distinct modules. With no futher ado, here are my goals (some, but not all of which I had already accomplished before starting on this series of blog posts):
- Create and print (using a 3D printer) a "badge" shape that resembles the Team Ironic logo.
- Place some sort of (ideally low-power) display in the center of the badge that can be used to display my name (or other information), ideally along with a logo or similar.
- Have the display update periodically, either to show different information, or to add a little fun (a FIRST core value) - for example by changing my title from "Coding Mentor" to "General Troublemaker" or "Dad Joke Specialist".
- Add colored LED's to the "electrons" in the Ironic logo, potentially changing color to show current Alliance color during matches, or just to create some visual interest.
I already had a Raspberry Pi available which is more than capable of being the "brains" of the badge, although it is also rather bulky and may need to be replaced by something more compact later in the process. That said, already owning it meant that there would be no immediate expense there to get the ball rolling. I also had a gift card left over from Christmas that I used to purchase the Waveshare 2.7 inch e-paper HAT (opens new window) because I thought it would be easy to work with, and it also included 4 buttons on the circuit board that could be used to change display modes.
Sure enough, the E-Paper display came with sample source code to demonstrate its capabilities and it was a relatively trivial task to adapt that code display both text and images in a combined view which was something I hoped would be possible. (My fallback option would have been to create images already including the desired text, but I was hoping that wouldn't be necessary because future plans include getting the badge to say "Hello [Name Here]" to curious youngsters.) I'll post the full source code online when I've completed the project, but because it's basically just the sample code there isn't much of interest to show there yet.
